Comprehensive Installation
3) A comprehensive approach: the GDS Docker container (slightly more advanced and complicated installation)
If meet the following requirements, Docker is a stable alternative and works out of the box:
- You have admin rights over your machine
- You are running either Windows 10 Pro, macOS, or Linux distributions that are supported by Docker.
It provides a stable platform to run complex software setups like that required in this context. Docker is a containerisation technology that allows to run pre-packaged (containerised) software under controlled environments. Relying on Docker, the gds_env project provides a containerised platform for Geographic/Urban Data Science.
This resource provides step-by-step descriptions on how to install and run Python from your own computer for all operating systems. See instructions below.
MacOS Installation
1. Installation
Requirements
To be able to complete this guide, your machine will need to meet the following requirements:
- A stable internet connection
- ~10GB of space on your hard drive
- MacOS version 10.13 or newer i.e. High Sierra, Mojave or Catalina. If you are unsure what version you are running click on the Apple icon in the top left of the screen and then About this Mac.
- Mac hardware must be a 2010 model or newer
Docker install steps
-
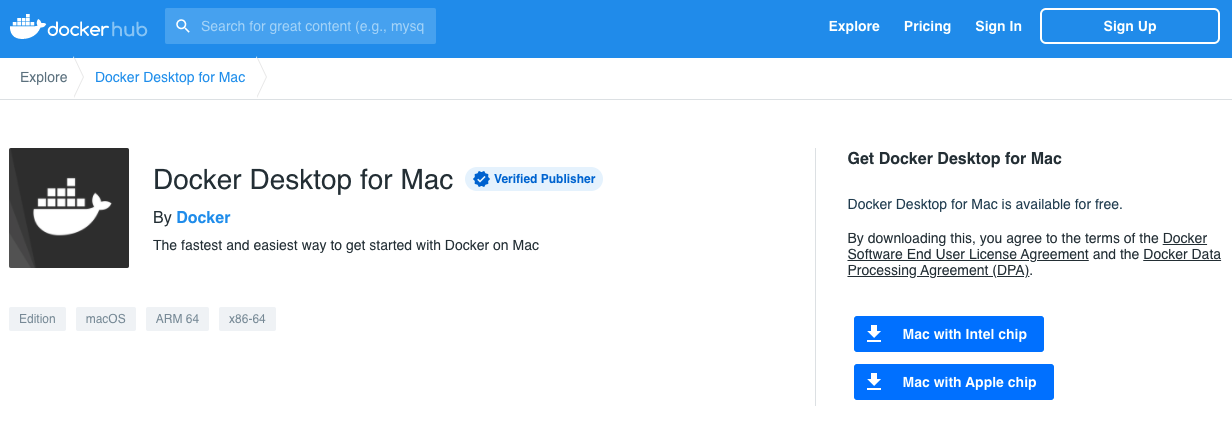
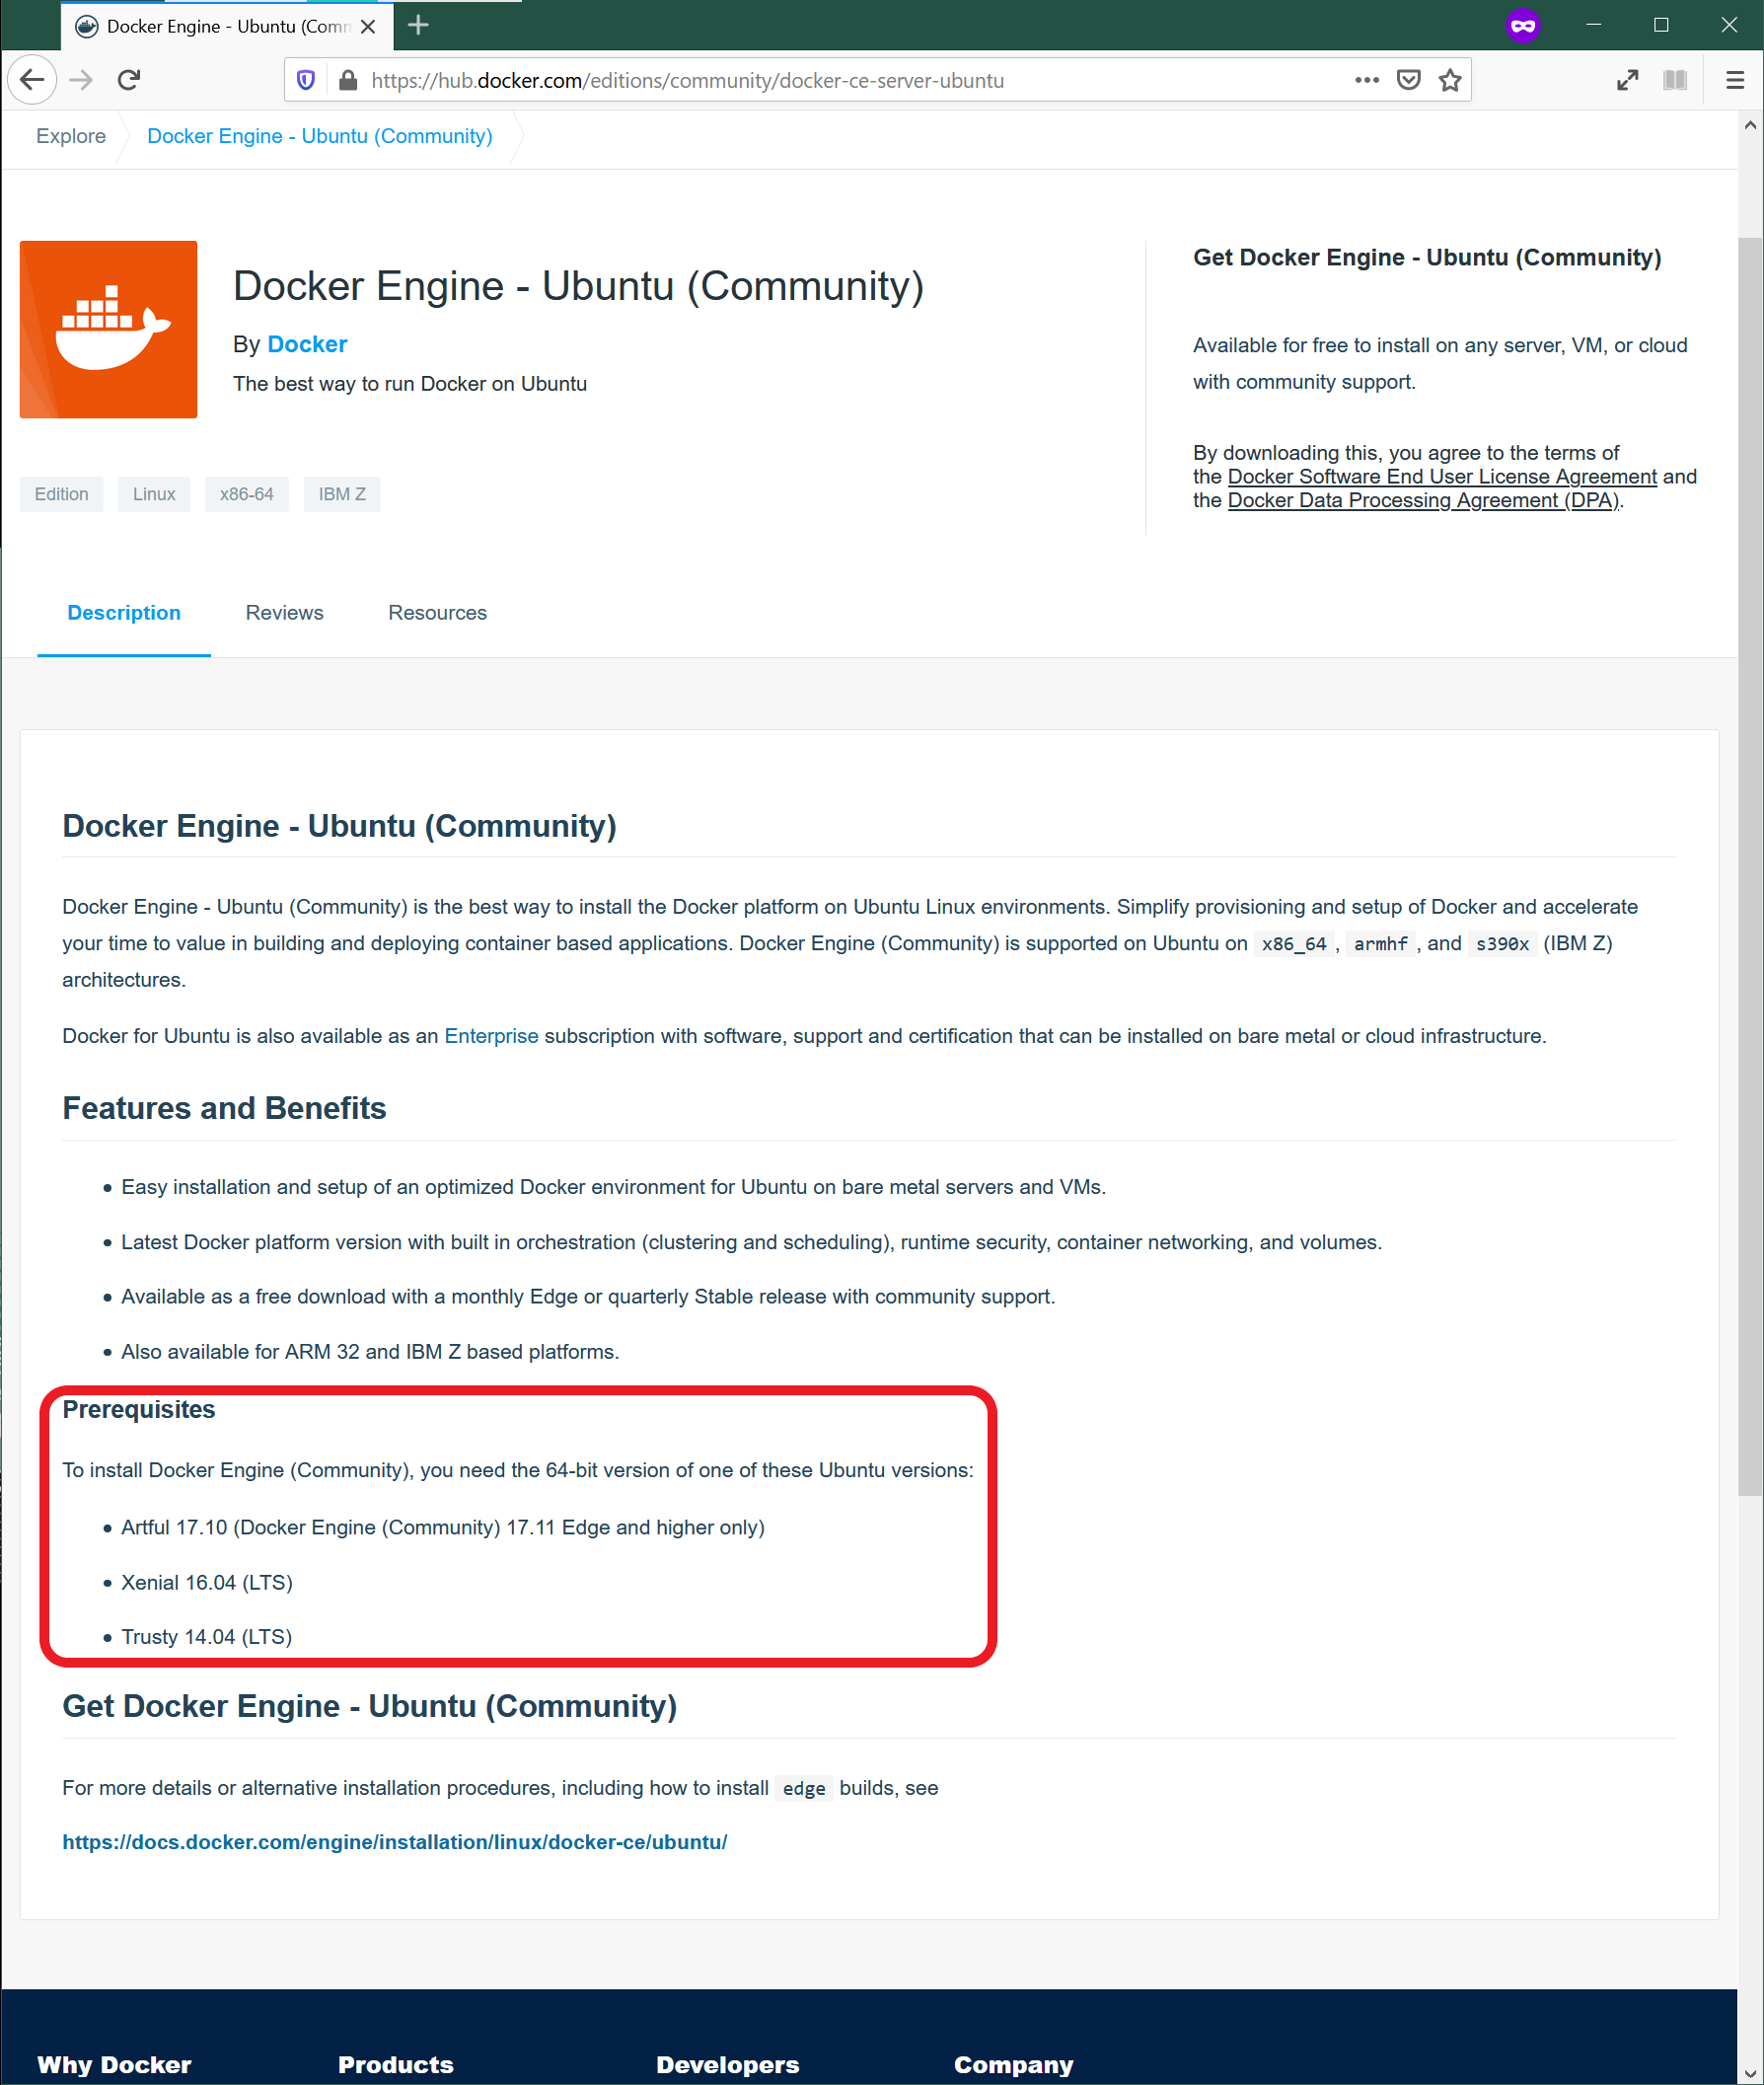
Go to the dockerhub website.
-
Select the version according to your Apple chip.
-
After you have installed the program and started it, the whale icon will appear in your taskbar as follows:

You have successfully downloaded Docker!
Using Docker
Now we have Docker installed we can use it to access Python and all the associated packages we need for the labs of this course.
Installing the GDS environment
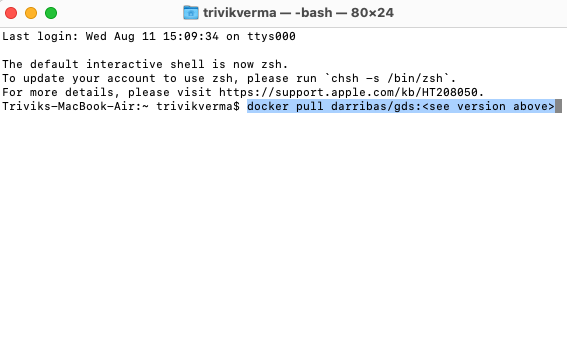
- Access your terminal: Launchpad > Other > Terminal
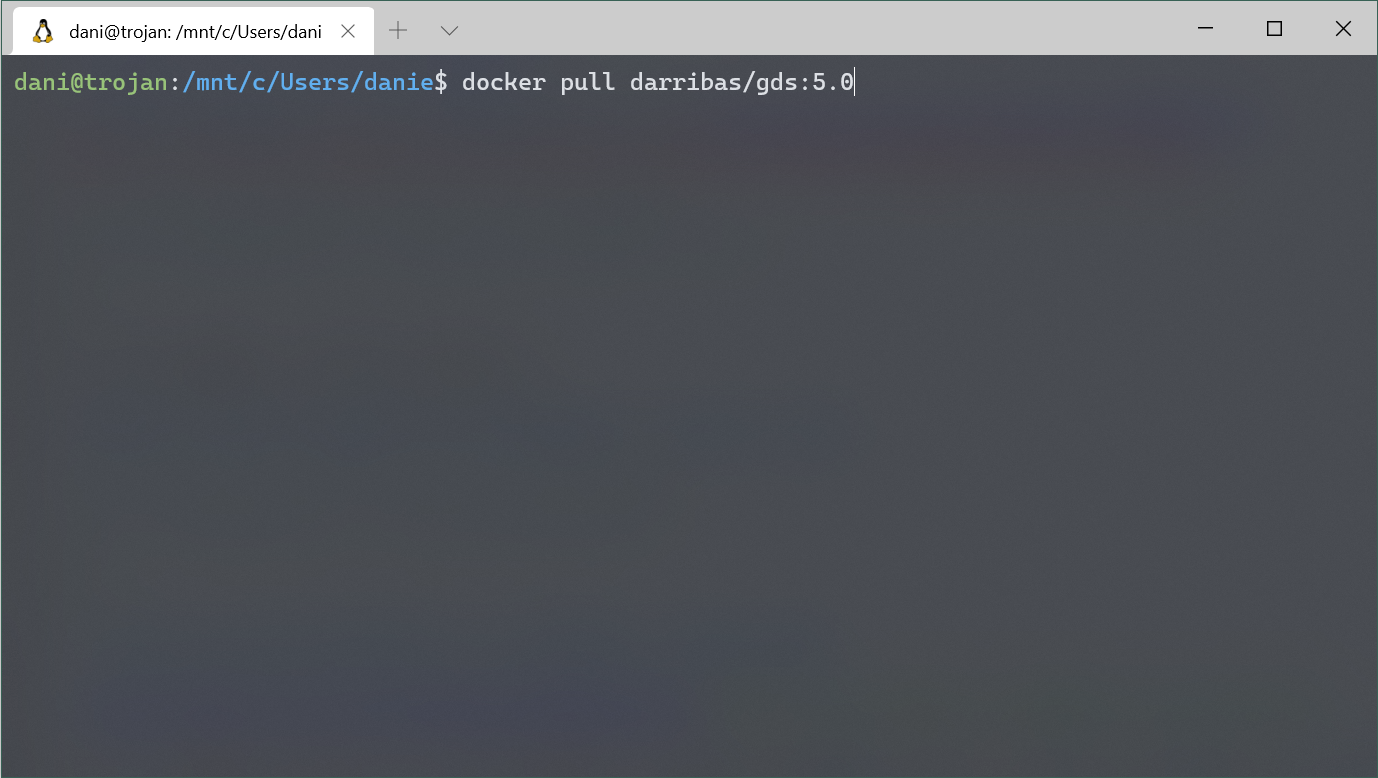
- In a fresh line in the terminal type the following to install the GDS environment container:
docker pull darribas/gds:6.1
- This should now prompt a long download process that looks a bit like this:
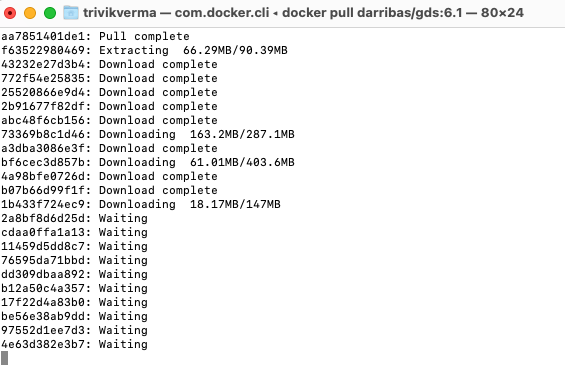
Dont be alarmed if it seems to take a very long time.
Make sure you are connected to the internet and it is a stable connection. This step involves the download of large amounts of data (~ 10GB) so it might take a while. However, it only needs to run once.
Check success
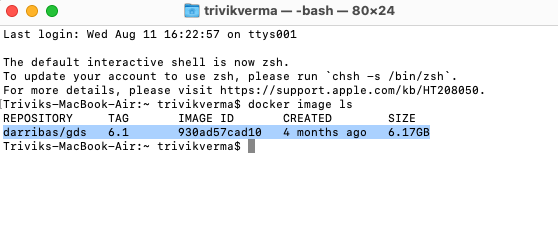
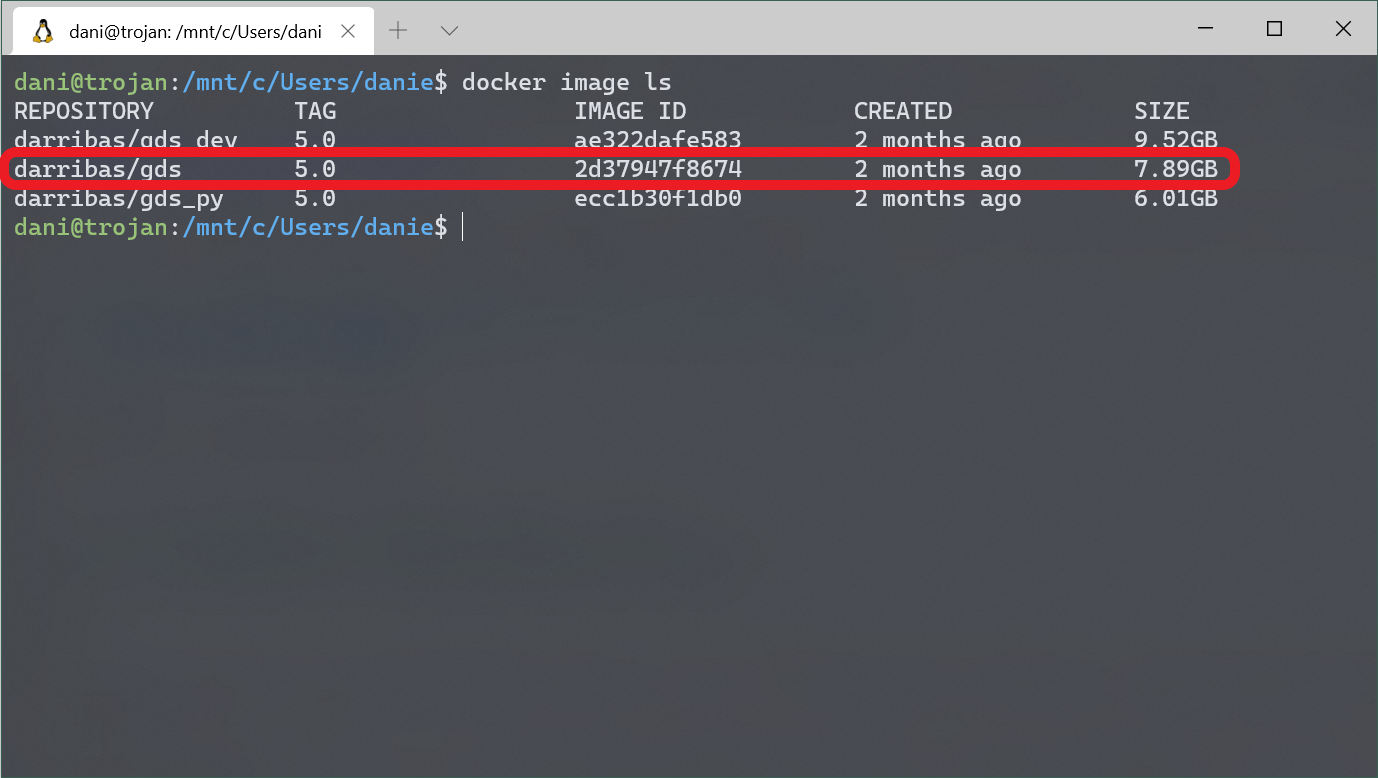
You will know the process has completed successfully when each line says ‘Pull complete’ and the new line shows your machine name.
If everything has gone according to plan, you should see darribas/gds:6.1 show up on your terminal when you type docker image ls (note in the image below there are other containers that are not required, do not worry if you don’t have those or slightly different values on the ID and the “CREATED” columns, the important bit is having darribas/gds:6.1 listed):
NOTE: please ignore the version showing in the screenshot, follow that in the command below
2. Running Python
The following sections cover how to start a python session using the docker container image you just installed, use it, and shut it down when you are done.
Running the container
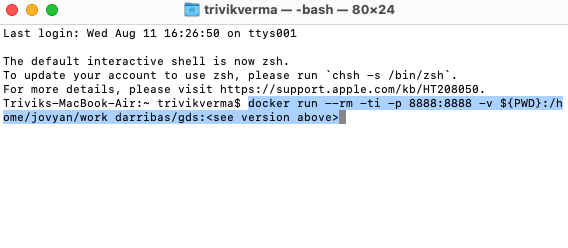
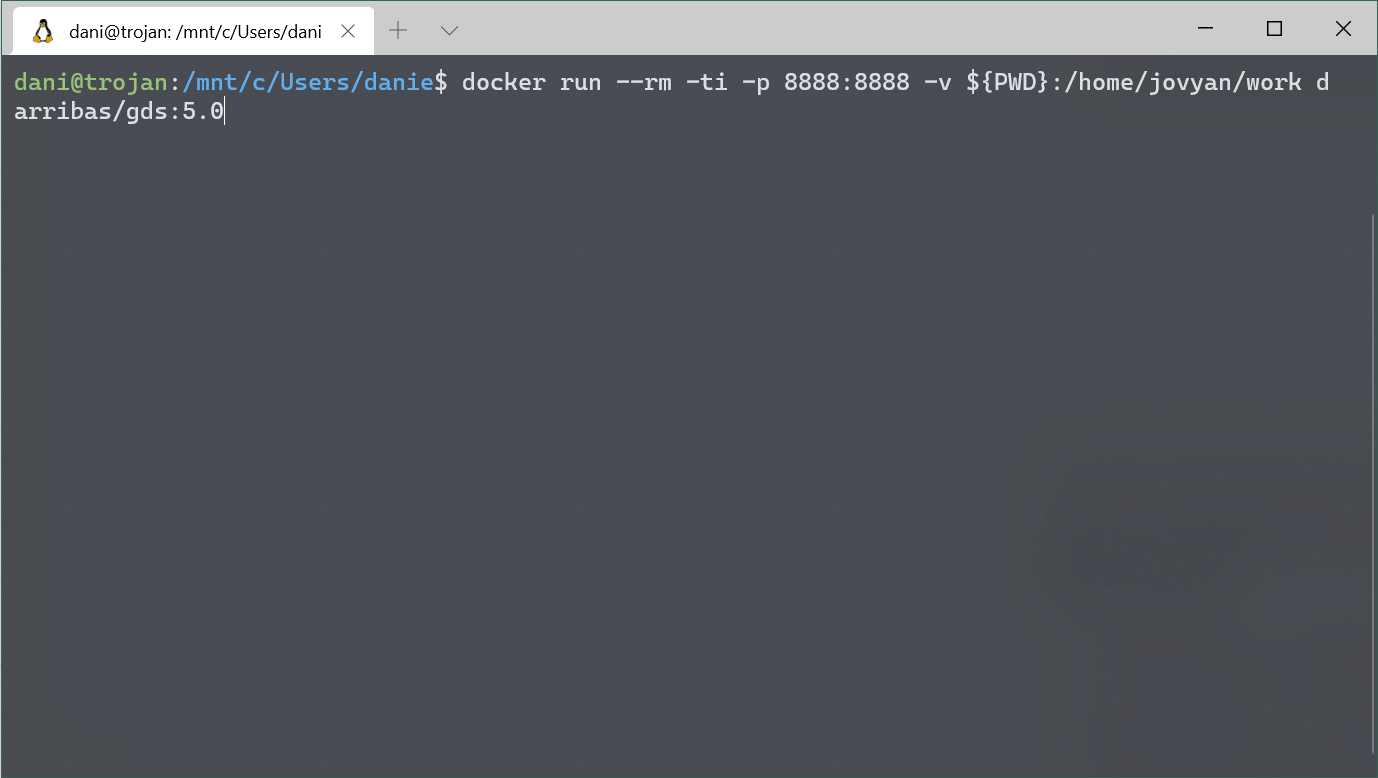
- In the new terminal line type the following command to run the container:
docker run --rm -ti -p 8888:8888 -v ${PWD}:/home/jovyan/work darribas/gds:6.1
You have now started a Python session.
Please do NOT close the terminal window until you are finished in this Python session.
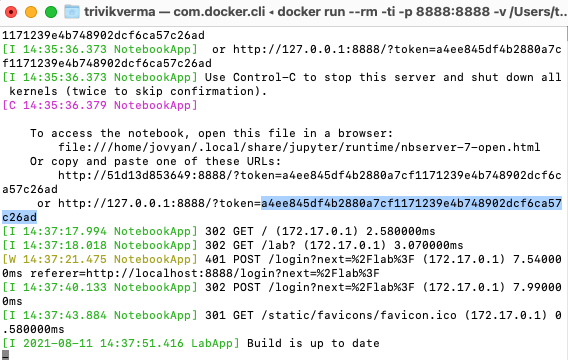
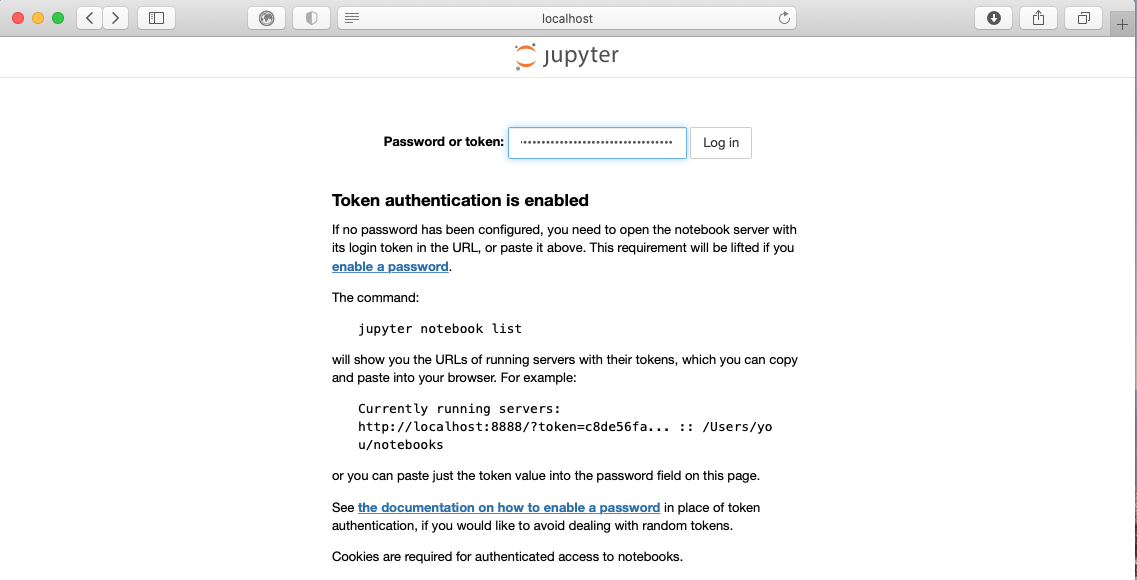
- To access this session go to your chosen web browser (e.g. Safari/Chrome) and type:
localhost:8888into the search bar

- The page that loads will prompt you for a password or a token. This can be found in the text in the terminal following the last command you ran (step 9). A long series of numbers and letters will be preceded by
?token=. Copy this long series of characters and paste into the password box in your browser.
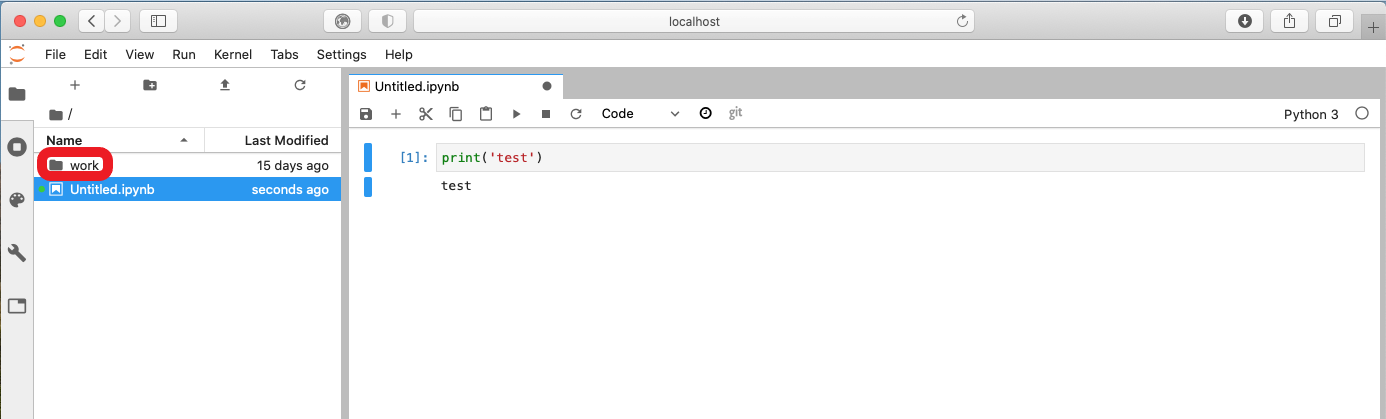
- Now that you are in Jupyter Lab you can open up a Python 3 notebook

Using Jupyter Notebook
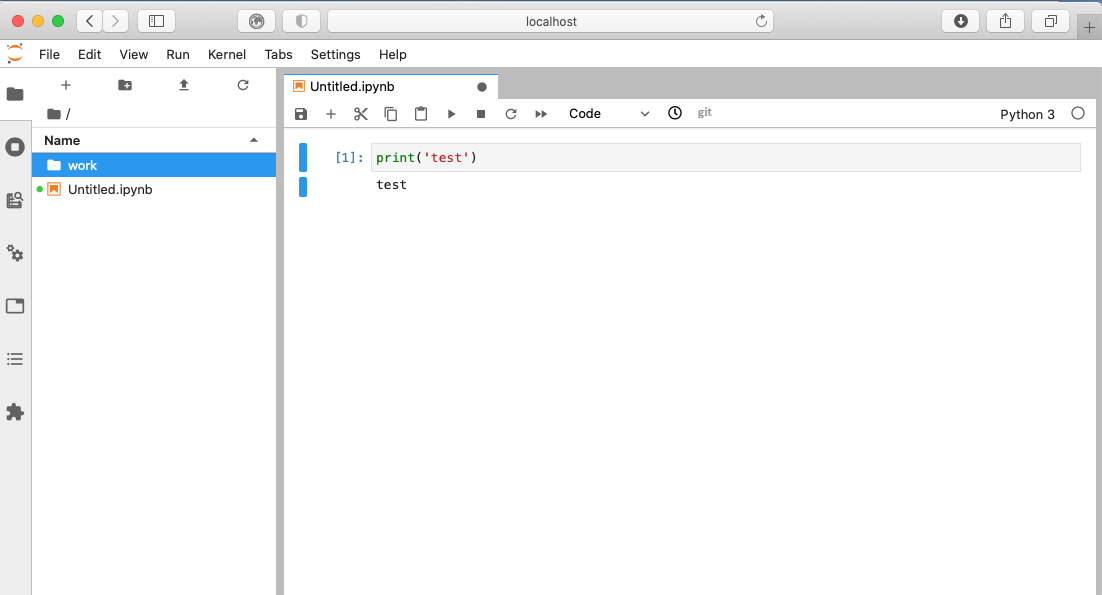
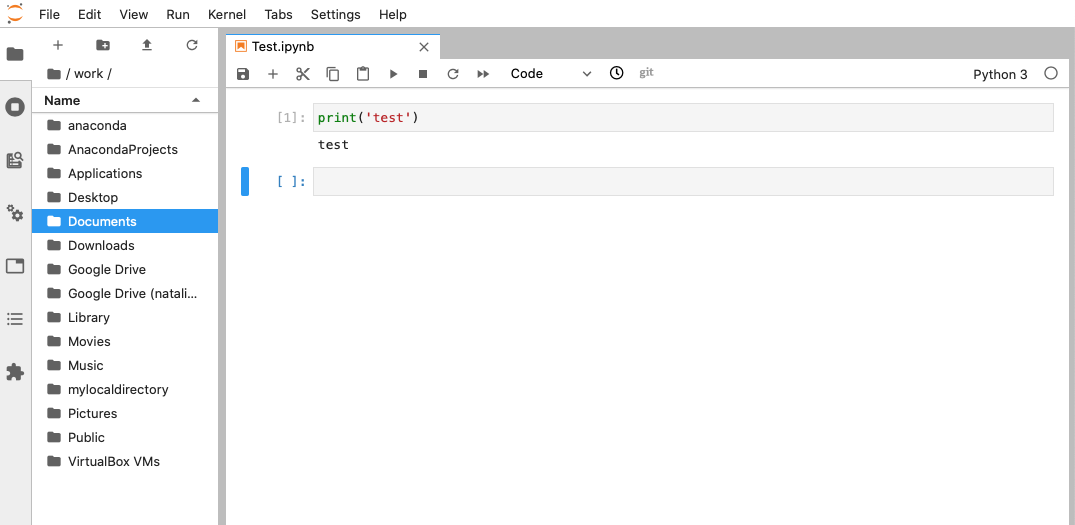
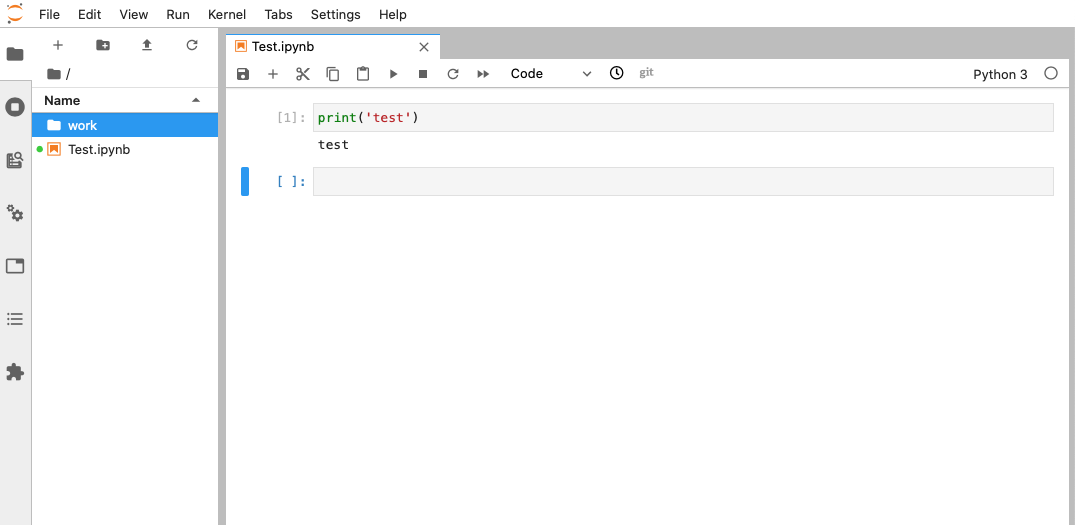
- This notebook is where you will run your code. Each shaded box is called a kernel. To test this out you can type
print('test')into one of these kernels. To run the code use the shortcutCtrl + Enter.
IMPORTANT:
Make sure you save files you want to keep ONLY within the work folder, as this will ensure they are saved on your machine.
Everything saved outside the work folder will be destroyed as soon as you shut down the session.
- You can access other files on your machine through the
workfolder in the File Browser. From here you can navigate to your Documents and designated folder for this module. For example, see below (this will depend on where you have stored the lab notebooks/data/other material for this course)
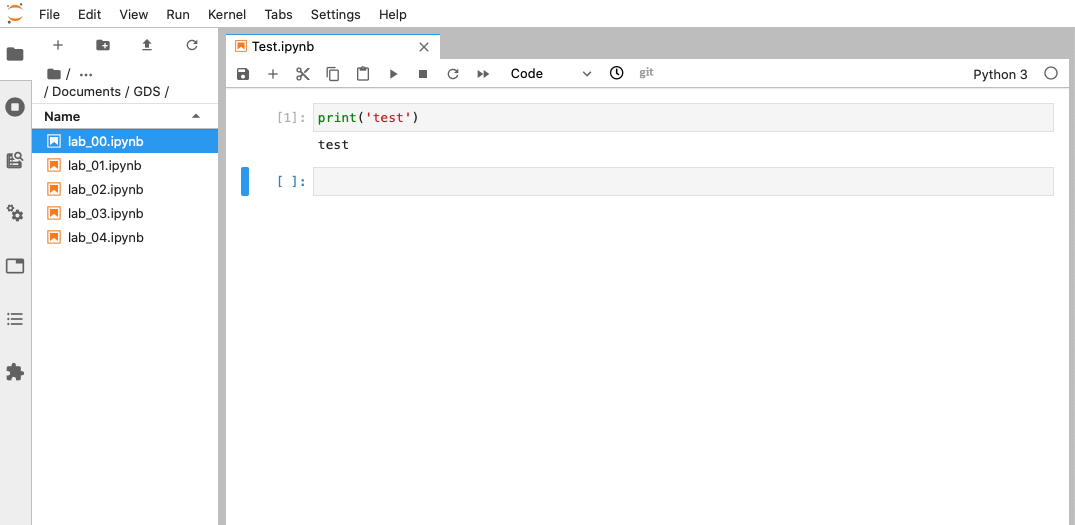
Here I am navigating to the folder that I have created for this module in my Documents. You can replace this with the pathway to the folder you create for this module.
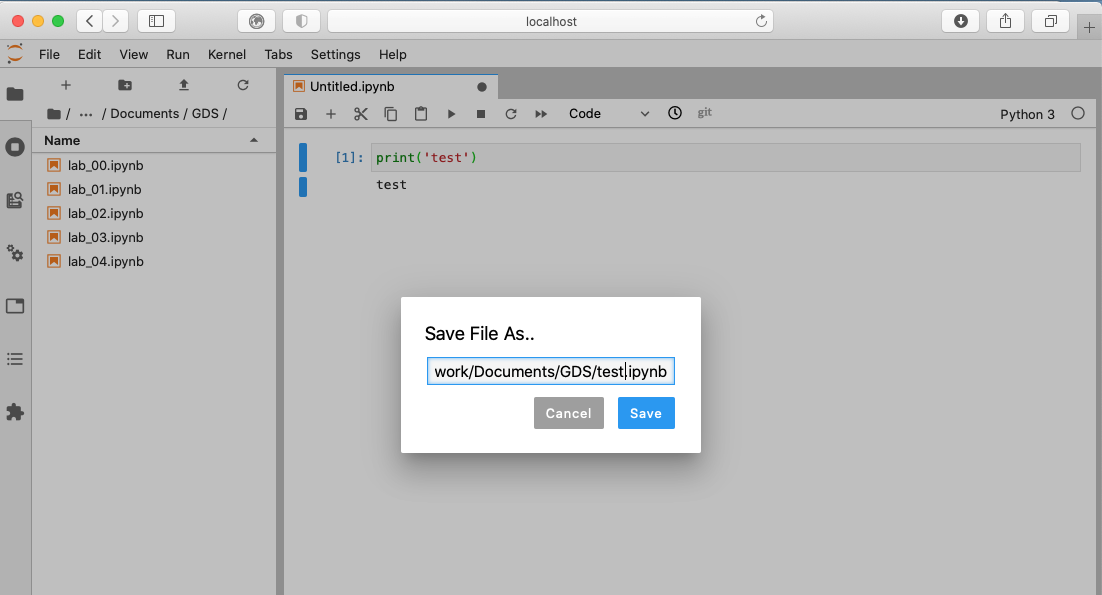
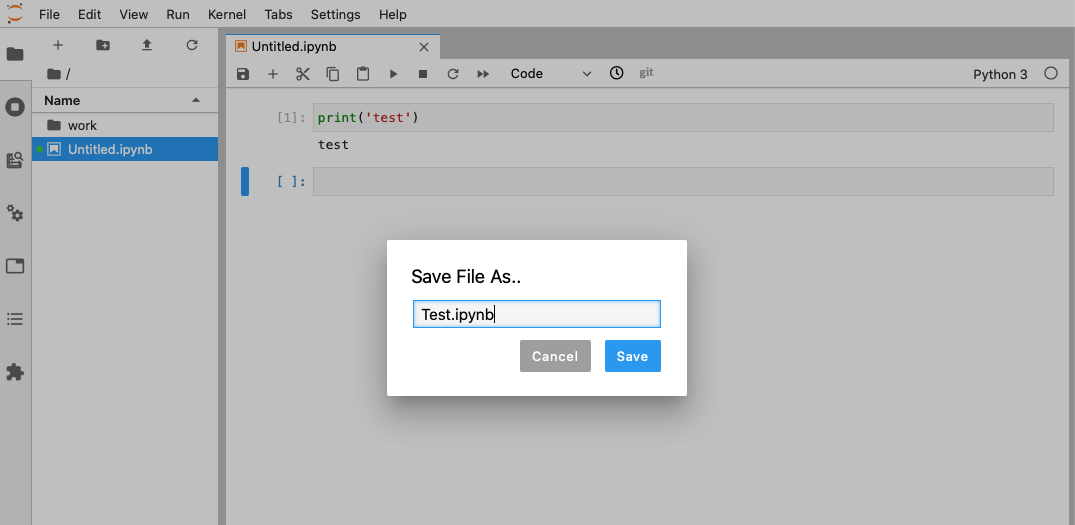
- You can save your notebook here using File > Save notebook as
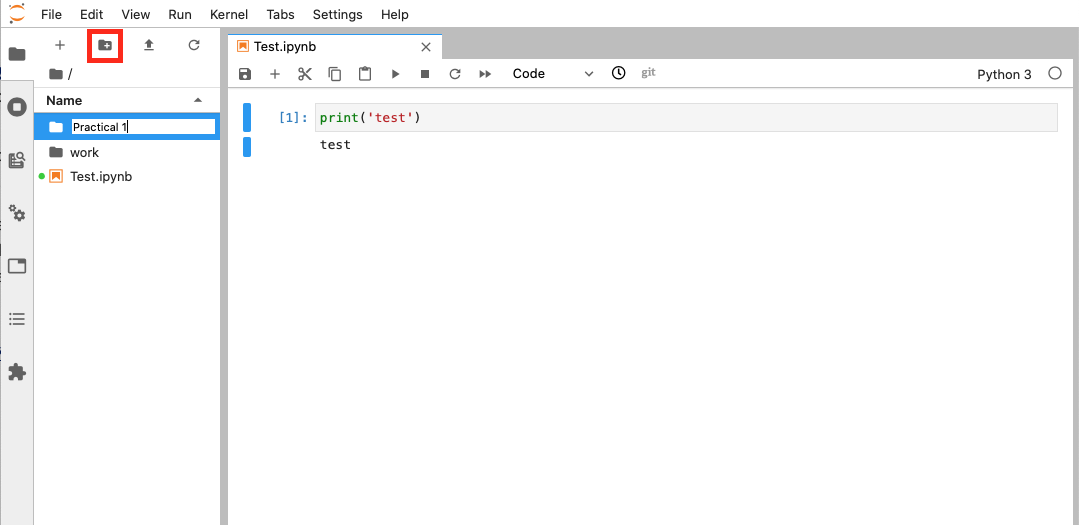
- And you can create new folders to organise your work

Ending your session
-
Once you have finished in your Jupyter session and have saved all your work, you can end the session from the terminal.
-
Using
Ctrl + Cwill prompt ay/noption. Either typeyorCtrl + Cagain to end the session. -
You can now safely shut the terminal window.
Next time you go to run a Jupyter Notebook you will not need to repeat the whole process as you have already installed Docker and the GDS environment. Instead you can start from Running the container and carry on from there.
Linux Installation
1. Installation
Requirements
To be able to complete this guide, your machine will need to meet the following requirements:
- A stable internet connection
- ~10GB of space on your hard drive
- A Linux distribution supported by Docker. You can check available distributions for ready installation on this page.
NOTE If you are running a different distribution (e.g. Arch Linux), there is a good chance Docker will work, but you will have to source your own instructions for installation. Once you have Docker up and running on your machine, you can move to Installing the GDS container.
Docker install steps
- Select the page for your distribution from the Docker Hub list of supported distributions
For this example, we will use Ubuntu.
- Make sure that you meet the requirements to install Docker:
- Follow the steps specified on the official install guide:
Once you complete these steps successfully, you will have Docker ready to go on your computer!
Installing the GDS container
Once you have Docker installed and running on your machine, installing everything you need to run Python and associated libraries boils down to the following two steps:
- Open your terminal app of choice (for example, Gnome Terminal)
- Run the following command:
NOTE: please ignore the version showing in the screenshot, follow that in the command below
docker pull darribas/gds:6.1
You will know this has completed when each line says ‘Pull complete’.
Make sure you are connected to the internet and it is a stable connection. This step involves the download of large amounts of data (ca. 10GB) so it might take a while. However, it only needs to be run once.
Check success
If everything has gone according to plan, you should see darribas/gds:6.1 show up on your terminal when you type docker image ls (note in the image below there are other containers that are not required, do not worry if you don’t have those or slightly different values on the ID and the “CREATED” columns, the important bit is having darribas/gds:6.1 listed):
NOTE: please ignore the version showing in the screenshot, follow that in the command below
2. Running Python
The following sections cover how to start a python session using the docker container image you just installed, use it, and shut it down when you are done.
Running the container
To start up Python through Docker, follow these steps:
- In a new terminal line, type the following command to run the container and hit enter:
NOTE: please ignore the version showing in the screenshot, follow that in the command below
docker run --rm -ti -p 8888:8888 -v ${PWD}:/home/jovyan/work darribas/gds:6.1
You have now started a Python session.
IMPORTANT:
Please do NOT close the terminal window until you are finished in this Python session
- To access this session go to your chosen web browser (e.g. Firefox/Chrome) and type:
localhost:8888into the search bar
- The page that loads will prompt you for a password or a token. This can be found in the text in the terminal following the last command you ran. A long series of numbers and letters will be preceded by
?token=. Copy this long series of characters and paste into the password box in your browser.

- Now that you are in Jupyter Lab you can open up a Python 3 notebook
Using Jupyter Notebook
- This notebook is where you will run your code. Each shaded box is called a kernel. To test this out you can type
print('test')into one of these kernels. To run the code use the shortcutCtrl + Enter.
IMPORTANT:
Make sure you save files you want to keep ONLY within the work folder, as this will ensure they are saved on your machine.
Everything saved outside the work folder will be destroyed as soon as you shut down the session.
- You can save your notebook using File > Save notebook as
- You can create new folders to organise your work
- And you can access other files on your machine through the ‘work’ folder in the File Browser. From here you can navigate to your Documents and designated folder for this module
Ending your session
-
Once you have finished in your Jupyter session and have saved all your work, you can end the session from the terminal.
-
Using
Ctrl + Cwill prompt ay/noption. Either typeyorCtrl + Cagain to end the session. -
You can now safely shut the terminal window.
Next time you go to run a Jupyter Notebook you will not need to repeat the whole process as you have already installed Docker and the GDS environment. Instead you can start from Running Python through Docker and carry on from there.
Windows
1. Installation
Requirements
To be able to complete this guide, your machine will need to meet the following requirements:
- A stable internet connection
- ~10GB of space on your hard drive
- Microsoft Windows 10 Professional, Education, Enterprise 64-bit, or Windows 10 Home 64-bit with WSL 2. You can see the full requirements on the official Docker for Windows page.
Docker install steps
Once you have everything required ready to go, the first step is to install the Docker Desktop App for Windows. Here are the steps you can follow:
- Head over to Docker Hub to download a copy of Docker for Windows:
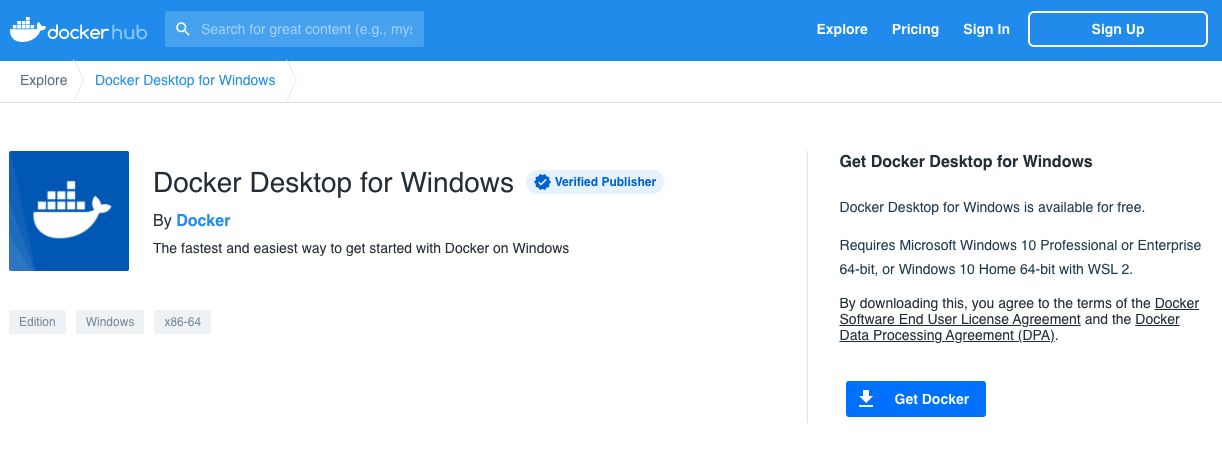
- Follow the instructions on the installation wizard to authorize the installer and proceed with the install.
You can check if the process has completed successfully by following these steps:
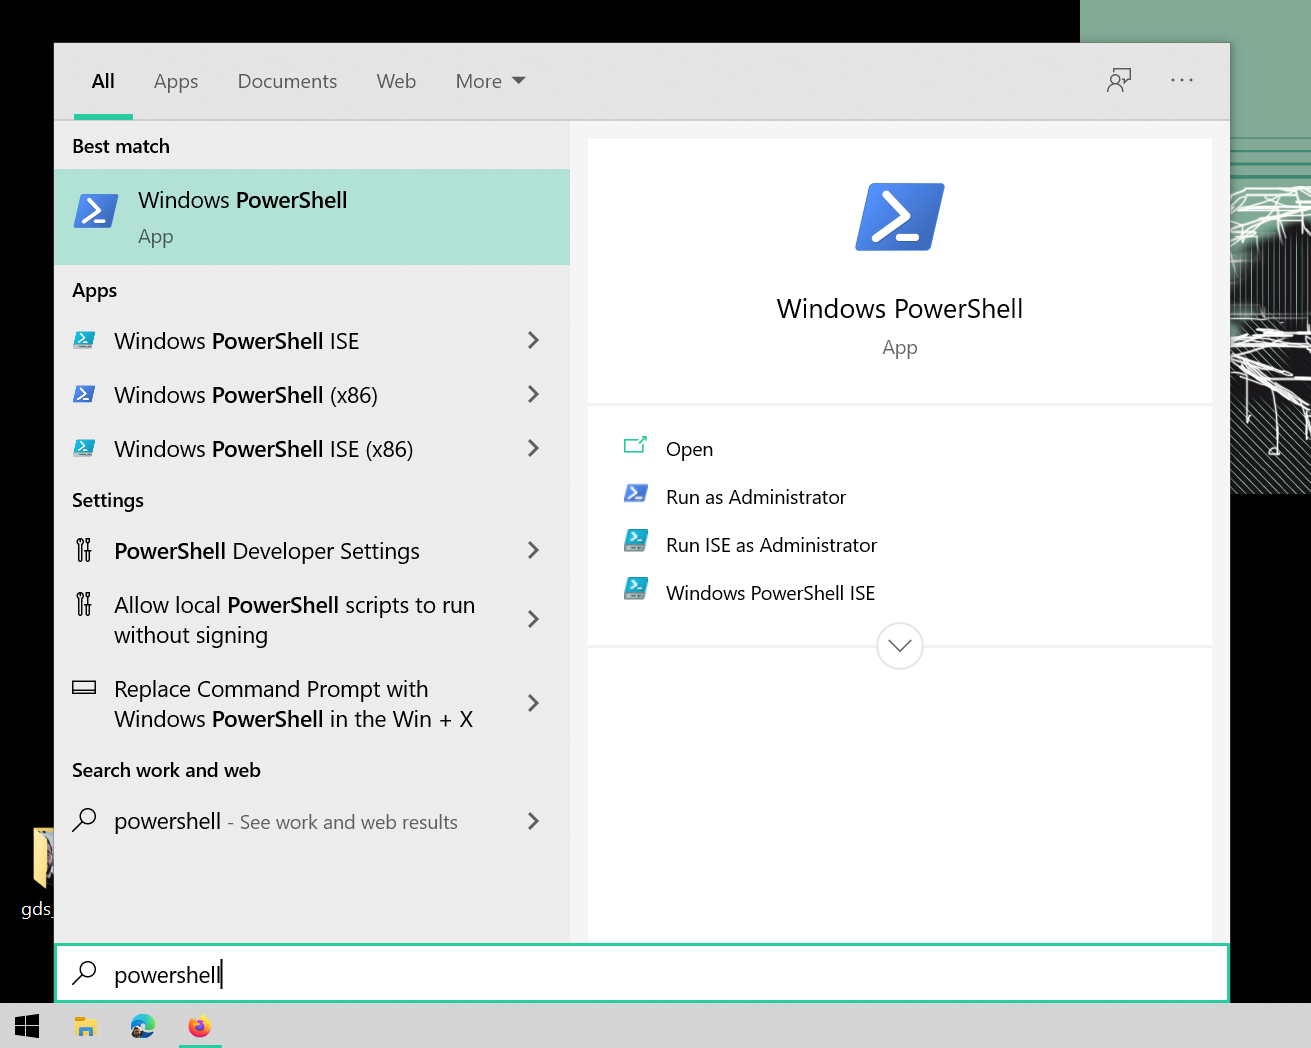
- Open PowelShell from the “Start Menu”
- Check Docker is available by printing out the version you have installed:
docker --version
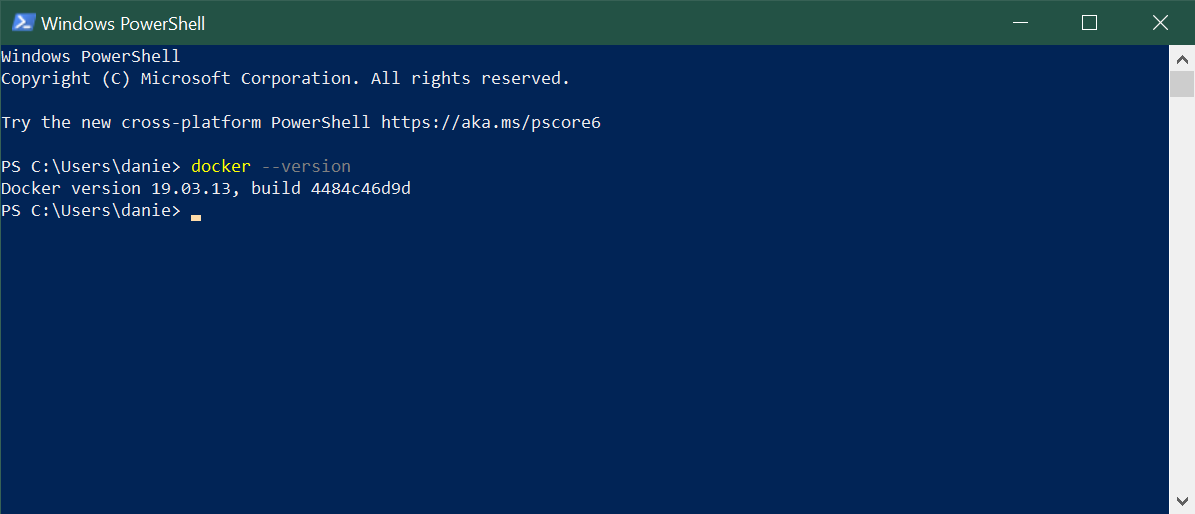
Note that you might have installed a slightly different version and that is totally okay. What you want to make sure is that it successfully prints out a version instead of a warning/error message (usually in red).
Installing the GDS container
Once you have Docker installed and running on your machine, installing everything you need to run Python and associated libraries boils down to the following two steps:
- Open PowerShell following the same steps as above (you can use the same window as before or a fresh new one).
- Run (type and hit “Enter”) the following command:
NOTE: please ignore the version showing in the screenshot, follow that in the command below
docker pull darribas/gds:6.1

You will know this has completed when each line says ‘Pull complete’.
IMPORTANT:
Make sure you are connected to the internet and it is a stable connection. This step involves the download of large amounts of data (ca. 10GB) so it might take a while. However, it only needs to run once.
Check success
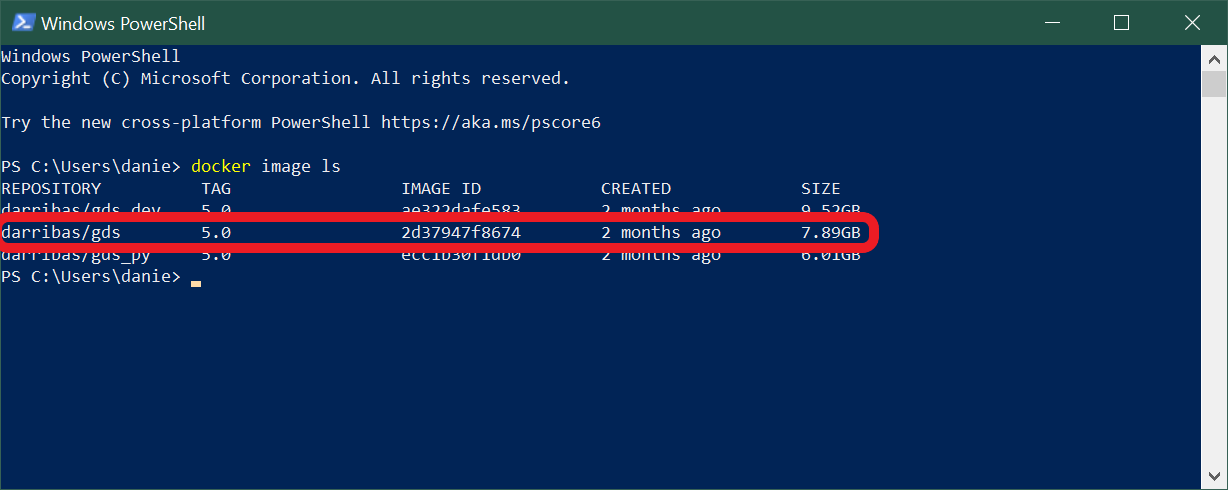
If everything has gone according to plan, you should see darribas/gds:6.1 show up on your terminal when you type docker image ls (note in the image below there are other containers that are not required, do not worry if you don’t have those or slightly different values on the ID and the “CREATED” columns, the important bit is having darribas/gds:6.1 listed):
NOTE: please ignore the version showing in the screenshot, follow that in the command below
2. Running Python
The following sections cover how to start a python session using the docker container image you just installed, use it, and shut it down when you are done.
Running the container
To start up Python through Docker, follow these steps:
- In a new PowerShell window, type the following command to run the container and hit enter:
NOTE: please ignore the version showing in the screenshot, follow that in the command below
docker run --rm -ti -p 8888:8888 -v ${PWD}:/home/jovyan/work darribas/gds:6.1
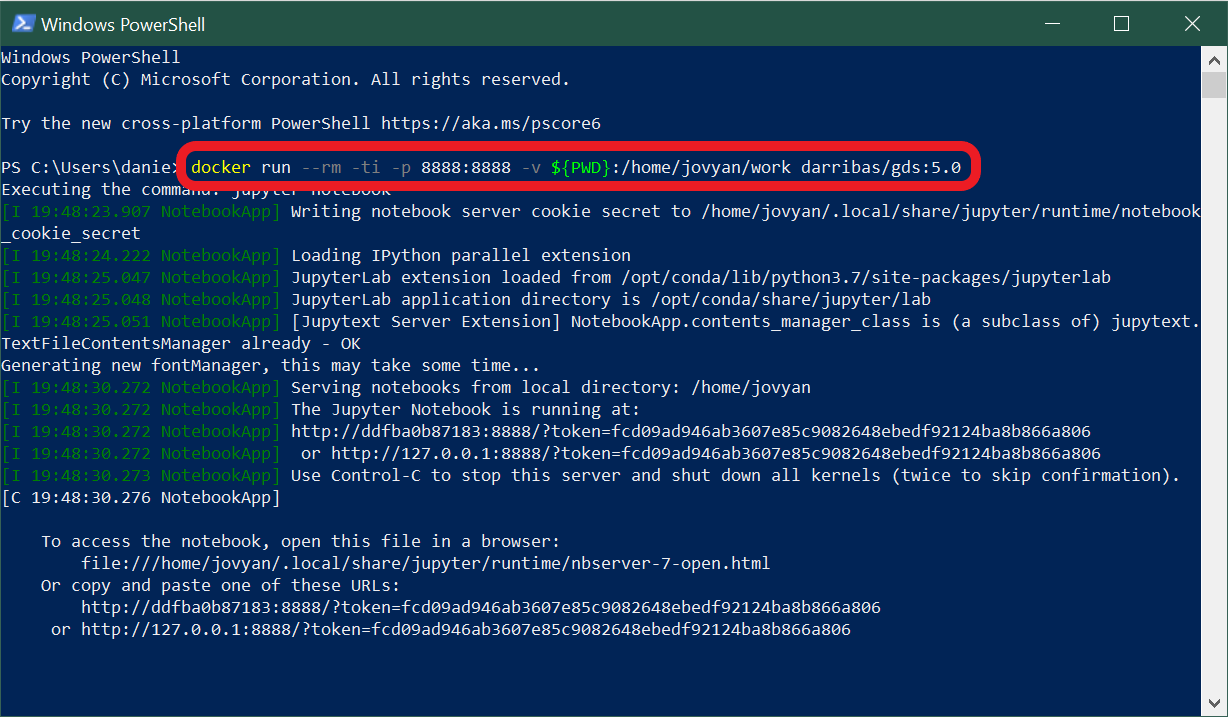
You have now started a Python session.
IMPORTANT:
Please do NOT close the PowerShell window until you are finished in this Python session
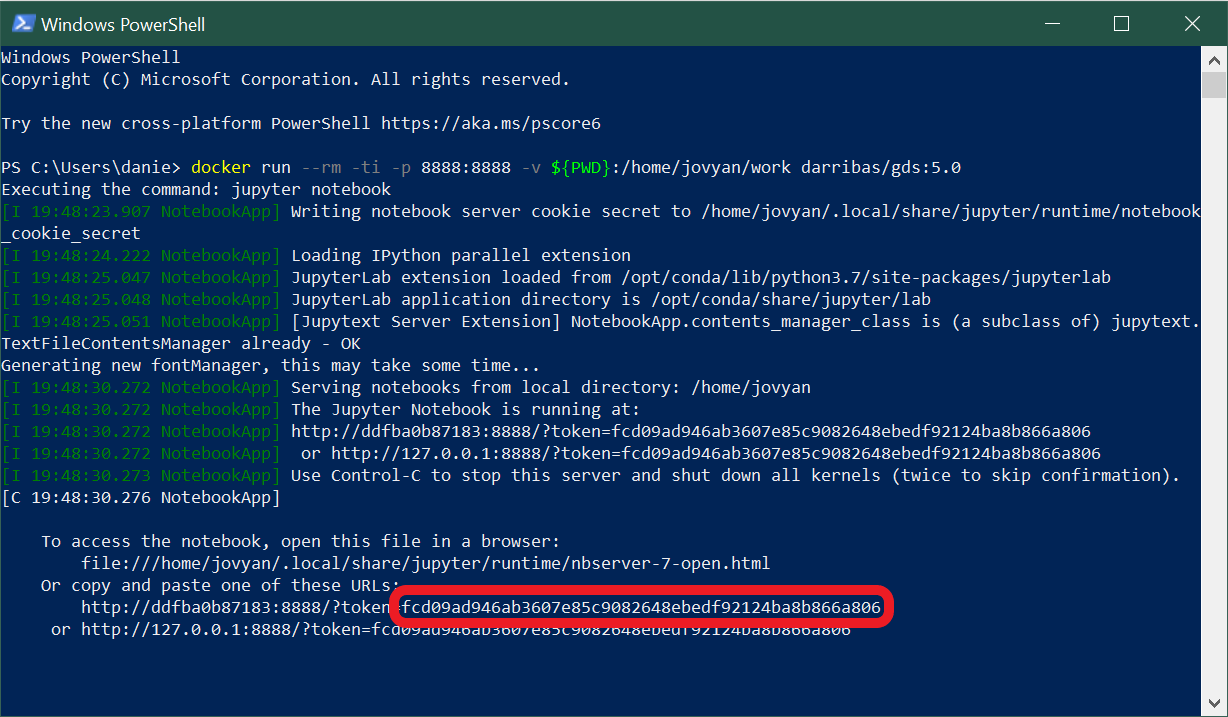
- To access this session go to your chosen web browser (e.g. Firefox/Chrome) and type:
localhost:8888into the search bar. You should see something similar to:
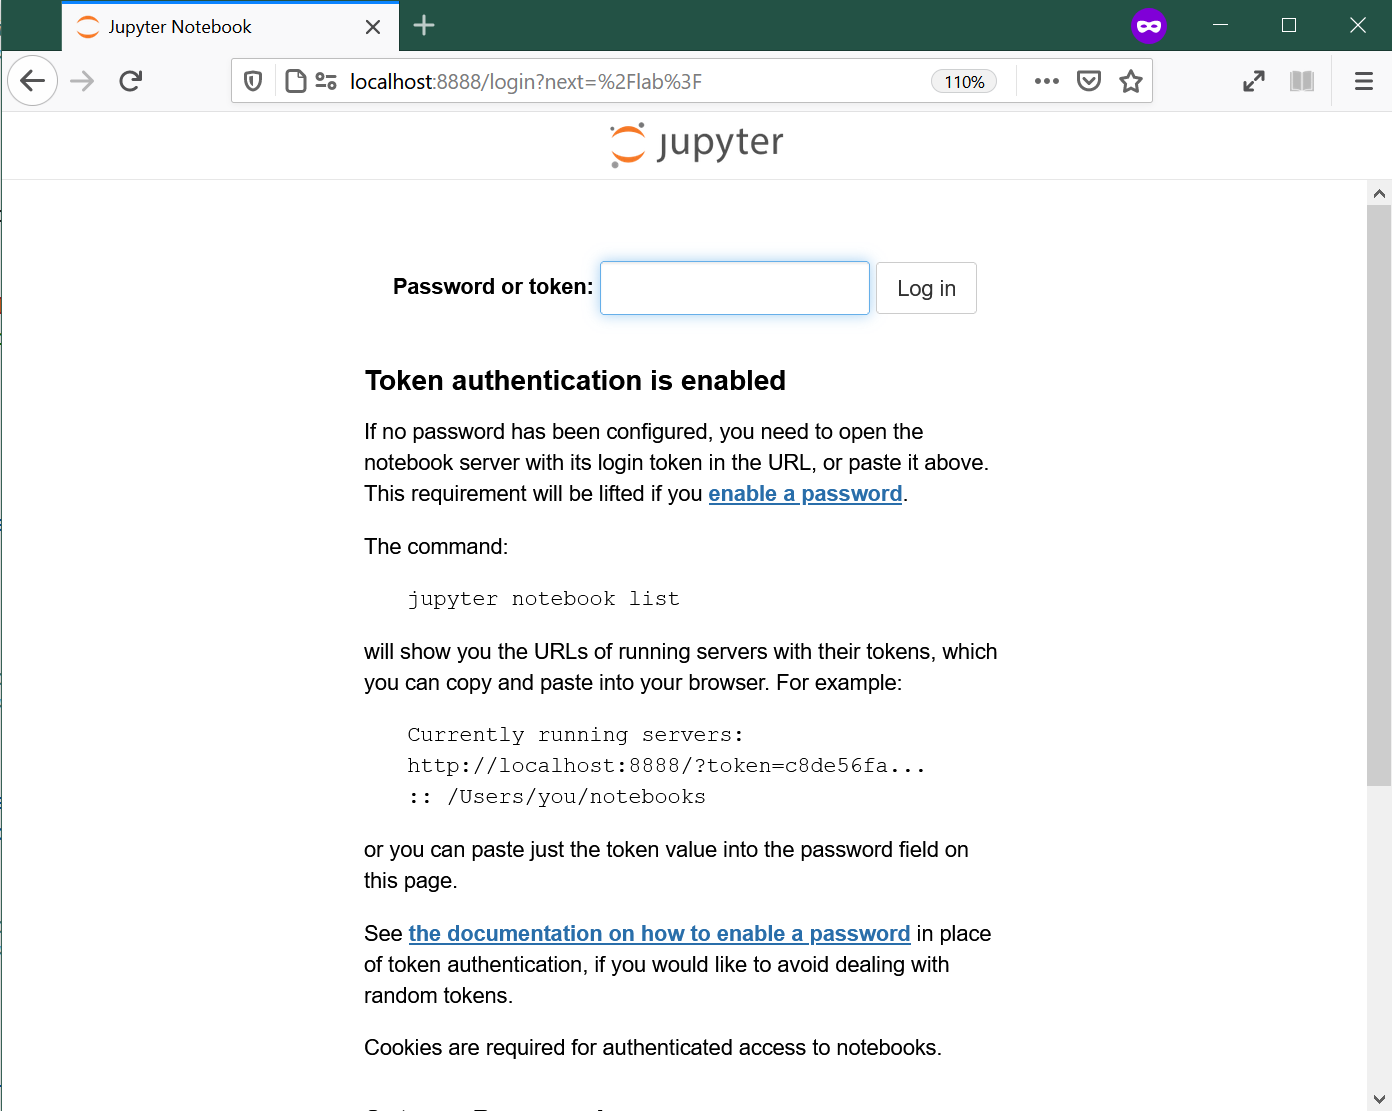
- The page that loads will prompt you for a password or a token. This can be found in the text in the terminal following the last command you ran. This will be a long series of numbers and letters will be preceded by
?token=. Copy this long series of characters and paste into the password box in your browser.
- Now you are in Jupyter Lab, it should look like this, more or less:

Using Jupyter Notebook
- This notebook is where you will run your code. Each shaded box is called a kernel. To test this out you can type
print('test')into one of these kernels. To run the code use the shortcutCtrl + Enter.
IMPORTANT:
Make sure you save files you want to keep ONLY within the work folder, as this will ensure they are saved on your machine.
Everything saved outside the work folder will be destroyed as soon as you shut down the session.
- You can save your notebook using File > Save notebook as
- You can create new folders to organise your work
- And you can access other files on your machine through the ‘work’ folder in the File Browser. From here you can navigate to your Documents and designated folder for this module
Ending your session
-
Once you have finished in your Jupyter session and have saved all your work, you can end the session from the terminal.
-
Using
Ctrl + Cwill prompt ay/noption. Either typeyorCtrl + Cagain to end the session. -
You can now safely shut the terminal window.
Next time you go to run a Jupyter Notebook you will not need to repeat the whole process as you have already installed Docker and the GDS environment. Instead you can start from Running Python through Docker and carry on from there.
This resource is adapted from Arribas-Bel, Dani. 2019. gds_env: A Containerised Platform for Geographic Data Science (version 6.1). https://darribas.org/gds_env.